Installing an Ohlins rear shock is a great way to take your motorcycle’s performance to the next level. With its superior damping and smooth ride, an Ohlins shock will make your bike handle better and last longer. But before you can enjoy the benefits of your new shock, you’ll need to make sure it’s installed correctly. Here’s a guide to help you through the process.
First, you’ll need to remove the old shock from your bike. Unbolt the spring from the shock body, and then remove the shock from the frame. Make sure you keep track of all the nuts and bolts, as you’ll need to reuse them when installing the new shock.
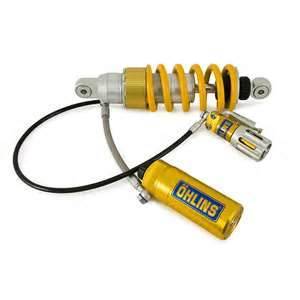
Next, you’ll need to install the new Ohlins shock. Start by lining up the mounting tabs on the shock body with the mounting holes in the frame. Make sure the shock is level before tightening the bolts.
Finally, you’ll need to make sure the shock is properly set up for your weight and riding style. This can be done by changing the spring rate and preload to match your weight and riding style. Once you’re satisfied with the settings, you’re ready to hit the road.
Installing an Ohlins rear shock is a great way to upgrade your bike’s performance and safety. With a few simple steps, you can get the most out of your new shock and enjoy a smoother, more comfortable ride.